Hi everyone!! I know it’s been a couple weeks since I posted last! Been super busy…but now that schools out for the summer I have some extra time to “create”!!
Here’s an album I created using the absolutely FABULOUS “Curtain Call” papers from Graphic 45!! I must admit…I’ve had this paper since it came out and have been hoarding it!! It’s so beautiful!! The papers have so much detail on them so I used that for my advantage! There isn’t a lot of embellishments on this album…it’s mostly the papers and ribbon/fibers!!
I used the smaller Celebrate It bags from Michaels and kept them upright! Each bag has inserts for additional photos.
Thanks for stopping by!! =)
Tuesday, June 21, 2011
Saturday, May 21, 2011
Vintage Shadow Box
Hello all you beautiful bloggers!!!
I wanted to share with you this shadow box I created! I’ve had this box in my stash for…okay I hate to admit it…a couple years!! Sad I know! The box actually held a wood bird feeder kit.
Anyways, I painted the box white and after it was completely dry and I took a sanding block and sanded all the edges! I then used a felt piece with my distress ink (vintage photo) and lightly inked some spots all over the box. This gave it a vintage antique feel.
I really enjoyed making this and love how it turned out!! My wonderful husband actually got involved also! Majority of the pieces in the box are real antiques that were found at our local antique shops! It’s one of our favorite things to do together!
Okay…I will give you a run down of exactly what is inside the box. We will start with the top. There is a vintage flash card in the corner with a “shoe” on the front, some old wooden spools, and a rusty old pair of sewing scissors (this is my favorite piece!), The frame is actually something I picked up at Michael’s and then just used my alcohol inks (Copper & Pearl) on it. The photo in the frame came from Melissa Frances packaging! Isn’t she just too cute! The flower is handmade using a vintage sheet of music! And then the envelope is another piece I found at the antique shop…it’s dated from 1952 so I had to add it to the box! Love it!! Oh, and before I forget…the background is again some vinage sheet music!!
The birdhouse is just one of those $1 finds you can pick up at JoAnns. I added some moss, flowers, bling, buttons, and some stems of gold and pearl berries. The butterfly was found in the wedding section at Hobby Lobby but I’m sure you can find something very similar at your local craft store! Lots of sanding and distress ink was added to the birdhouse also to give it the same vintage feel.
Okay, so down at the bottom left hand side! I used a piece of Webster’s Pages for the background…just love that dress form!! A beautiful gerber daisy sits on the bottom with a silver lid I used as a mini shadow that holds some old 1 cent stamps and a key. The large door plate is actually an extra one that came from my house (which is 102 years old)…so I had to use it!! The white paint on it was already there. I added the small doorknob.
Last section! The background has a new bingo “Journey” card (not sure what brand or collection it came from sorry) and then a real vintage Bingo card (the blue one). I have some older clothes pins clustered on one of the sides with a small frame leaning against them. This frame came from my wonderful Aunt Ginger (Thank You!!) and I just used my copper color alcohol ink. An old “dimes” money roll is also in the back and then my vintage dice! Like I said in the beginning of my post…my husband found majority of the antique pieces for this project so a HUGE “Thank You” to him also!!
Thanks for stopping by...and feel free to ask me any questions you may have!
Thursday, May 19, 2011
Cupcake Cutie
Good morning to you all! I really hope you all are having a wonderful day so far!
I wanted to share with you some projects I created and posted under a different blog I was trying to start up...long story short, it didn't work out! Starting up a new blog is very time consuming!! So...I will be slowing posting those projects on this one to share with you all (sorry to those who've already seen them)!!
Here is a couple cards I created for some wonderful ladies who helped me in a time of need!
I used to super cute "Simply Charmed" Cricut cartridge for both the cupcake and pie...aren't they just too cute!!
So here's the Cupcake card. I made a pocket on the inside to house three tags and a super cute hand mixer from Cosmo Cricket.
And then this card is an easel card...they are so much fun to make and unbelievably easy!! So thank you Auntie Ginger for showing me how to make this!!
I hope you enjoyed them and thanks so much for visiting me on this wonderful morning!
Have a fabulous day!!
Wednesday, May 11, 2011
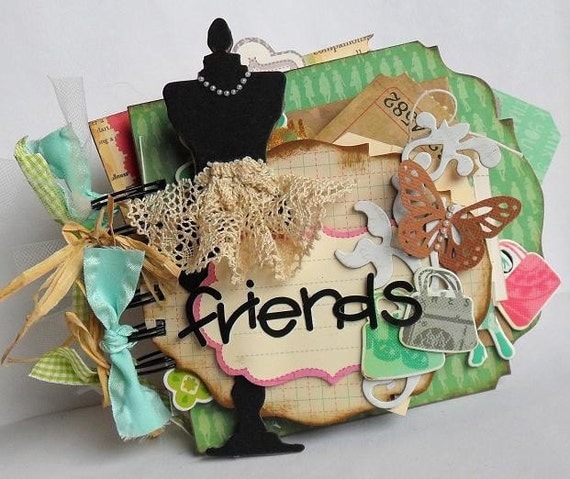
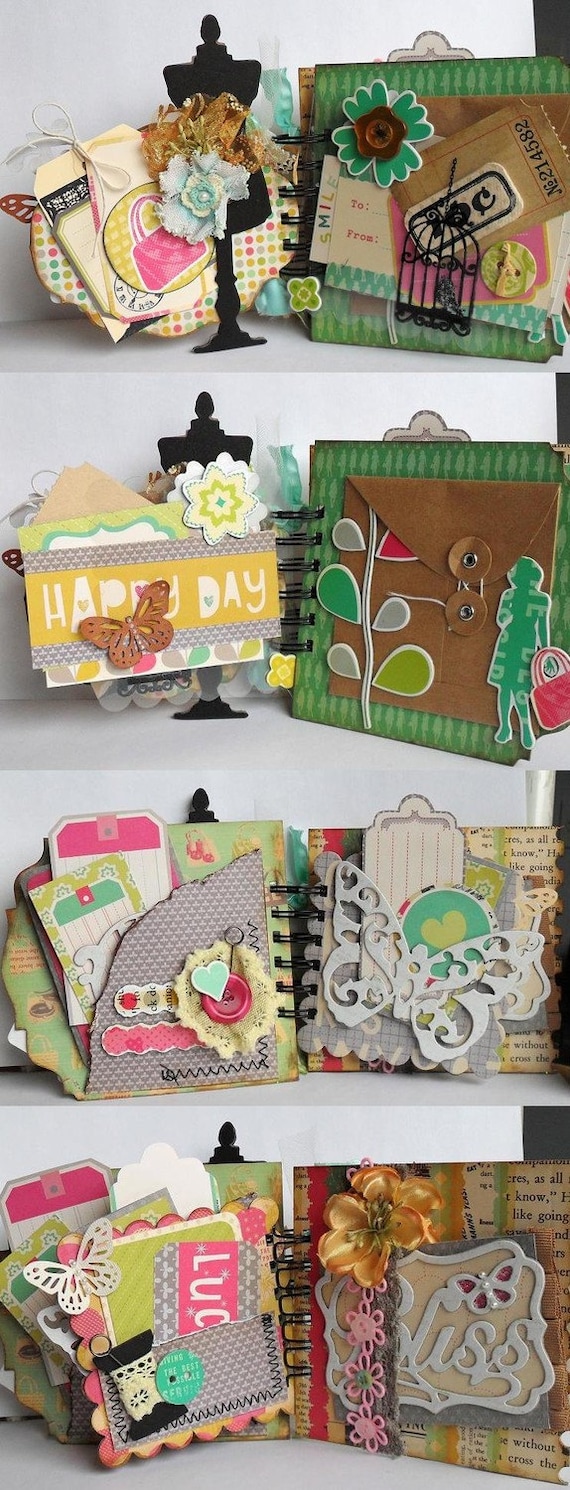
UpCycle "FRIENDS" Mini Album
Isn't this UpCycle paperline to die for!! I absolutely LOVE it!! So adorable!!
This album was so fun to make! There is so much detail in this little mini!! Tons of tags and photomats!! And for those of you who know me...I just can't scrap flat! So as you can see...there is LOTS of dimension to each page!!
Monday, May 9, 2011
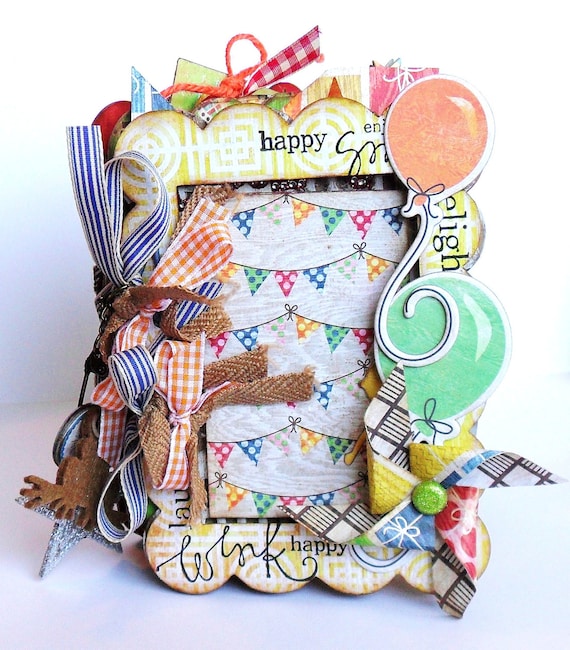
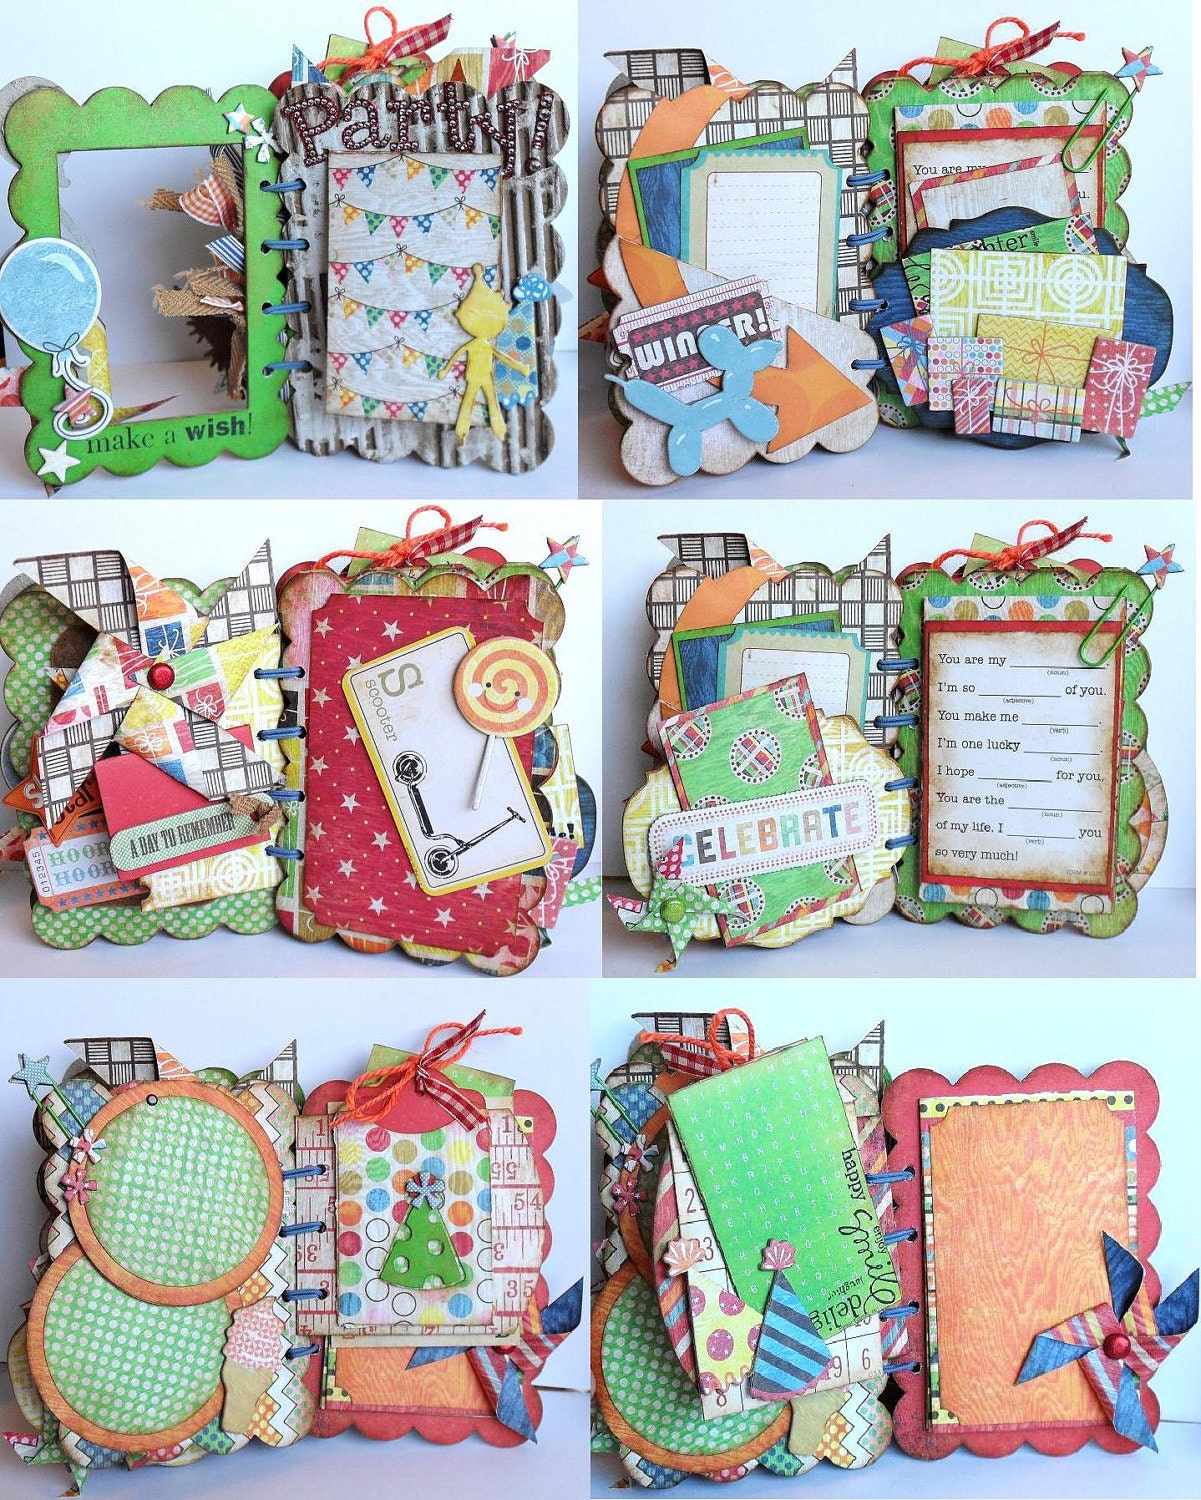
PARTY Pinwheel Mini Album
Hello ladies!! How are you all doing this lovely morning?
So I wanted to share this album I created the other day for my Etsy store!! I absolutely loved how it turned out!! So much so I almost kept it for myself! lol
There are so many foldouts and tags in this mini album!! LOTS of room for photos and journaling!! And this paper line by Basic Grey is absolutely fabulous!! I was in a major scrappy rut last week and this paper collection totally got me through it!!
Let me know what you think about it and thank you for stopping by!
Sunday, May 8, 2011
My Pink Stamper Challenges #6 thru #12 "I FINISHED"
HOly Moly!!! I got them all finished!! All the 12 challenges over at My Pink Stamper!! Can you believe that!! It was so much fun!! I ended up leaving the layout last...it's been FOREVER since I've scrapped a layout!! Funny thing...I ended up dreaming up my layout last night!! lol My Auntie Ginger, Mom and I had so much fun scrapping this weekend (and we are still going)...we literally "Cropped til we dropped"!!! Passed out at 1am just to wake up and get back to where we left off!! So much fun!
Okay...so here's the run down of the challenges I finished up last night! Oh, and I apologize for the "not so great" photos...I'm scrapping at my Mom's and didn't bring my laptop to edit them! Awww!!
#6 Incorporate a tag into your project! So I decided to make a super grunged up tag to put on the front of a card!! LOVE how it turned out!! Lots of distress ink and glimmer mist on this one!! Even crackled inside the Tim Holtz book plate!!
#7 Make a Scrapbook Layout!! I LOVE how this turned out!! I actually made it to hang in my scrappy room! This line of paper from K&Co is plastered all over my walls in my room! I absolutely love all the bright vintage colors!! Just need to add my photo from this weekend!!
#8 Make a summer theme project! Again...another card! It's pretty simple...I actually struggled with this one! Not exactly sure why!
#9 Use Glitz, Glam and Glitter!! Talk about easy for me, I LOVE to glam it up!! This card is super 3D with tons of fabulous girly chipboard pieces!! There's a cocktail drink, purse, shoe, NY landscape, feathers, glitter....and lots of GLAM!!! lol
#10 Make a project with a pet on it! Had to go girly on this one!! Made it for my adorable little niece's birthday next month!! The kitty is sitting on a diamond plate embossed pillow! I also wrapped a circle with twine for a little ball of yarn!
#11 Use Pink, Green and Black!! One of my favorite color combos!! OMG...and look!! I made something other than a card! I'm sure this bookmark with never see the inside of a book but it was so much to make!!
#12 Make a kid's theme project!! Okay...I'm totally in love with making these pinwheels! Got a little carried away with them on this card! But no worries...it's for a little birthday boy who's party we are going to this next weekend!!
WHEW!!! I can't believe I got al of those done!! It was so much fun!! Thank you My Pink Stamper for the FABULOUSLY fun weekend!!!! And thank you for stopping by my blog...please come back again to visit!!
Okay...so here's the run down of the challenges I finished up last night! Oh, and I apologize for the "not so great" photos...I'm scrapping at my Mom's and didn't bring my laptop to edit them! Awww!!
#6 Incorporate a tag into your project! So I decided to make a super grunged up tag to put on the front of a card!! LOVE how it turned out!! Lots of distress ink and glimmer mist on this one!! Even crackled inside the Tim Holtz book plate!!
#7 Make a Scrapbook Layout!! I LOVE how this turned out!! I actually made it to hang in my scrappy room! This line of paper from K&Co is plastered all over my walls in my room! I absolutely love all the bright vintage colors!! Just need to add my photo from this weekend!!
#8 Make a summer theme project! Again...another card! It's pretty simple...I actually struggled with this one! Not exactly sure why!
#9 Use Glitz, Glam and Glitter!! Talk about easy for me, I LOVE to glam it up!! This card is super 3D with tons of fabulous girly chipboard pieces!! There's a cocktail drink, purse, shoe, NY landscape, feathers, glitter....and lots of GLAM!!! lol
#10 Make a project with a pet on it! Had to go girly on this one!! Made it for my adorable little niece's birthday next month!! The kitty is sitting on a diamond plate embossed pillow! I also wrapped a circle with twine for a little ball of yarn!
#11 Use Pink, Green and Black!! One of my favorite color combos!! OMG...and look!! I made something other than a card! I'm sure this bookmark with never see the inside of a book but it was so much to make!!
#12 Make a kid's theme project!! Okay...I'm totally in love with making these pinwheels! Got a little carried away with them on this card! But no worries...it's for a little birthday boy who's party we are going to this next weekend!!
WHEW!!! I can't believe I got al of those done!! It was so much fun!! Thank you My Pink Stamper for the FABULOUSLY fun weekend!!!! And thank you for stopping by my blog...please come back again to visit!!
Saturday, May 7, 2011
Fantabulous Cricut Challenge #58
And the night continues on!! WHOO HOO!!!!
What a total mess we are making...and that's not including every kitchen counter space that's COVERED!! But my goodness we are accomplishing LOTS!!
Okay...so I've been stalking this AMAZING blog for a couple weeks now!! Fantabulous Cricut Challenge!!! My amazing Auntie Ginger introduced me to it and I'm was super excited to finally get to play along with this weeks challenge!! The challenge was to include 3 flowers on your project!! Easy peasy for me!! Here's what I came up with! The card base was cut out using the Wild Card cartridge and the adorable little bees are from Kate's ABC's!! Love it!!
Oh!! And look who decided to sneak into the picture!!! =)
Thanks for visiting me!!!
What a total mess we are making...and that's not including every kitchen counter space that's COVERED!! But my goodness we are accomplishing LOTS!!
Okay...so I've been stalking this AMAZING blog for a couple weeks now!! Fantabulous Cricut Challenge!!! My amazing Auntie Ginger introduced me to it and I'm was super excited to finally get to play along with this weeks challenge!! The challenge was to include 3 flowers on your project!! Easy peasy for me!! Here's what I came up with! The card base was cut out using the Wild Card cartridge and the adorable little bees are from Kate's ABC's!! Love it!!
Oh!! And look who decided to sneak into the picture!!! =)
Thanks for visiting me!!!
My Pink Stamper Challenges #4 and #5
I'm on a roll ladies!!!
Here's my card (yes...I know!! I'm a HUGE card lover) for challenge four which was to create a project with a Mother's Day theme!! So here's what I came up with!! I used the fabulous Tim Holtz fence die and GlimmerMist it along with some alcohol and distress ink!! The sentiment says "May your day be as....Bright as a Flower".
And last is my 3D project for challenge five! I ended up making a stair step card (love to make these)!! It was a blast!! Here's the scoring dimension for those of you who've never made one of these! I used a piece of 4" x 10.5" cardstock. Score at 1.25, 2.5, 4.25, 6 & 8.25
HOpe you like it!! The picture doesn't show the 3D very well...sorry!
NSD with "My Pink Stamper"!! Challenges #1, #2 and #3
Hello Ladies!!!
OMG...it's been FOREVER since I've posted projects to my blog!! But what better time to do so than on "National Scrapbooking Day"!! I'm having so much fun!! My fabulous Auntie Ginger drove over for the weekend to CROP!!! We are having such a blast!!!
Anyways...I've been busy creating some fabulous projects for the challenges over at My Pink Stamper!! So far I've completed the first three projects!! Here they are!!
The first challenge was to create something with a cupcake!! Couldn't resist an adorable cupcake card!! Lots of embossing was done with my handy dandy Cuttlebug!! Loved how it turned out!!
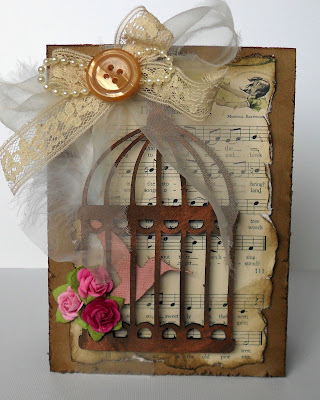
The second challenge was to create a project using Kraft cardstock! For those of you who know me...cards are one of my faves!! So here's what I came up with! I cut this gorgeous birdcage out using the Serenage Cricut cartridge!! Added some foam tape and an adorable little hummingbird inbetween!! The birdcage was cut out using Kraft cardstock but I also GlimmerMist it and added some alcohol inks to give it a vintage look!! Let me know what you think!!
And last but not least was Challenge three...to create a project with a breast cancer theme! Again I had to make another card! I have several friends who have either fought or are currently fighting this battle! So I had to make this card SUPER girly (isn't that a shock...lol)!! Embossed the background with the Tim Holtz folder and then used a Martha Stewart punch on the edge!!
Thanks for stopping by and taking a look!!
Hope you all are having as much fun today as I am!!!
Subscribe to:
Posts (Atom)